


ARKit is a framework offered by Apple that lets users create powerful augmented reality apps with little code. To demonstrate some of the capabilities ARKit has to offer, I will be demoing how to build a ps4 game tracker using ARKit. Let's start with the basic setup.
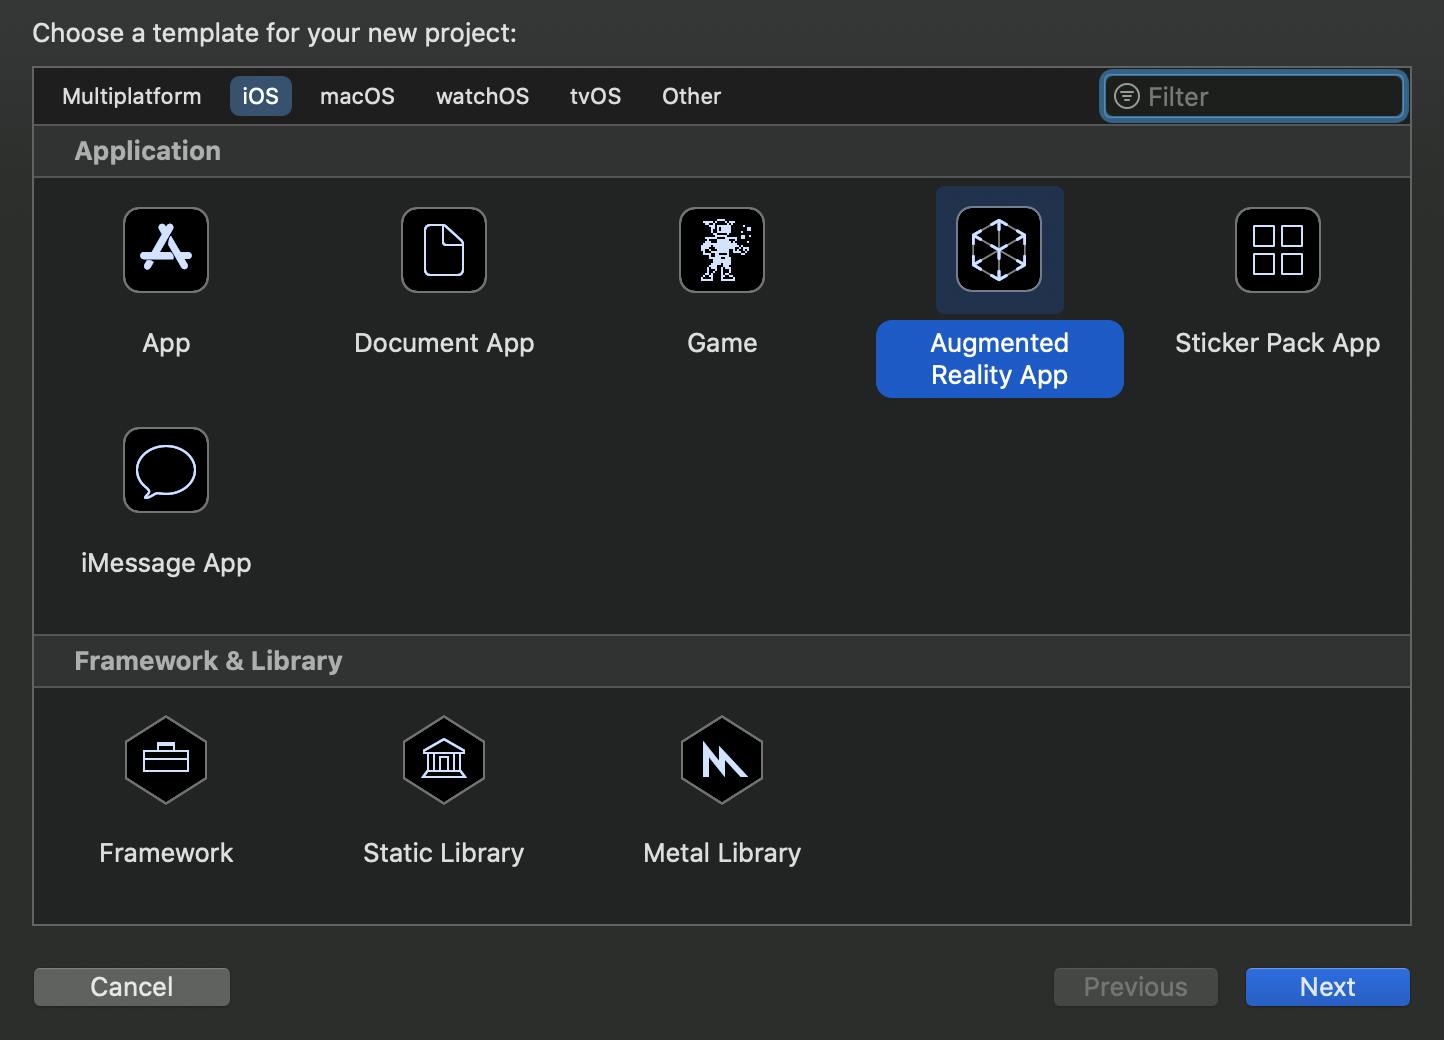
When starting a new project with Xcode. you are presented with some available project templates. At this point you will want to select "Augmented Reality App" as this is the batteries included template for your augmented reality project.
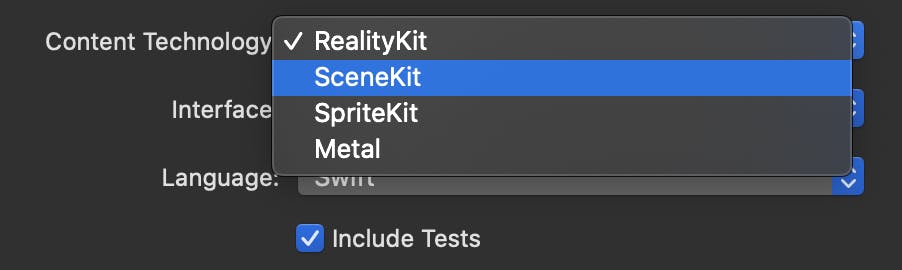
After this. you will be able to configure options for the project, fill out the applicable options and be sure to set "Content Technology" to SceneKit, as Reality Kit is set by default.
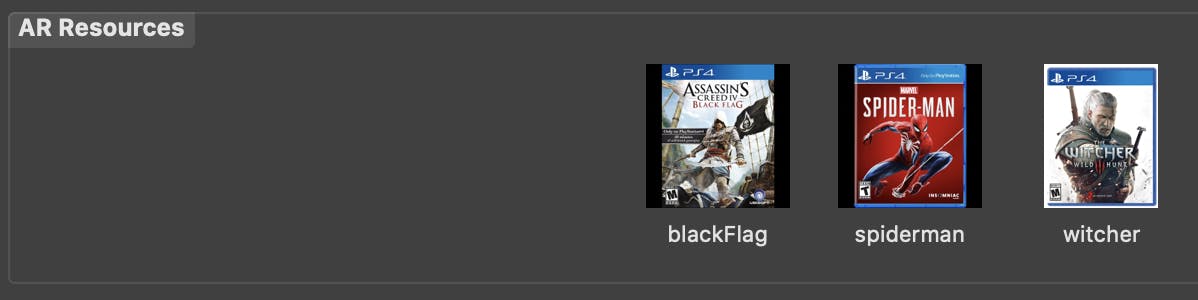
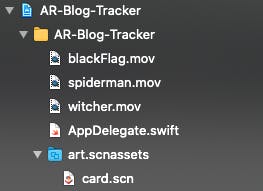
In order to track ps4 games, thee app will need a resource to compare what app i looking at with what it is searching for. If you look in your files structure on the left, you will find 'Assets.xcassets'. Create a folder called 'AR Resources'. In here I've added photos of what I want the App to keep an eye out for. In the case of this application it is ps4 games I want the app to track. So add the photos we want tracked. I added three photos of ps4 game titles to demonstrate.
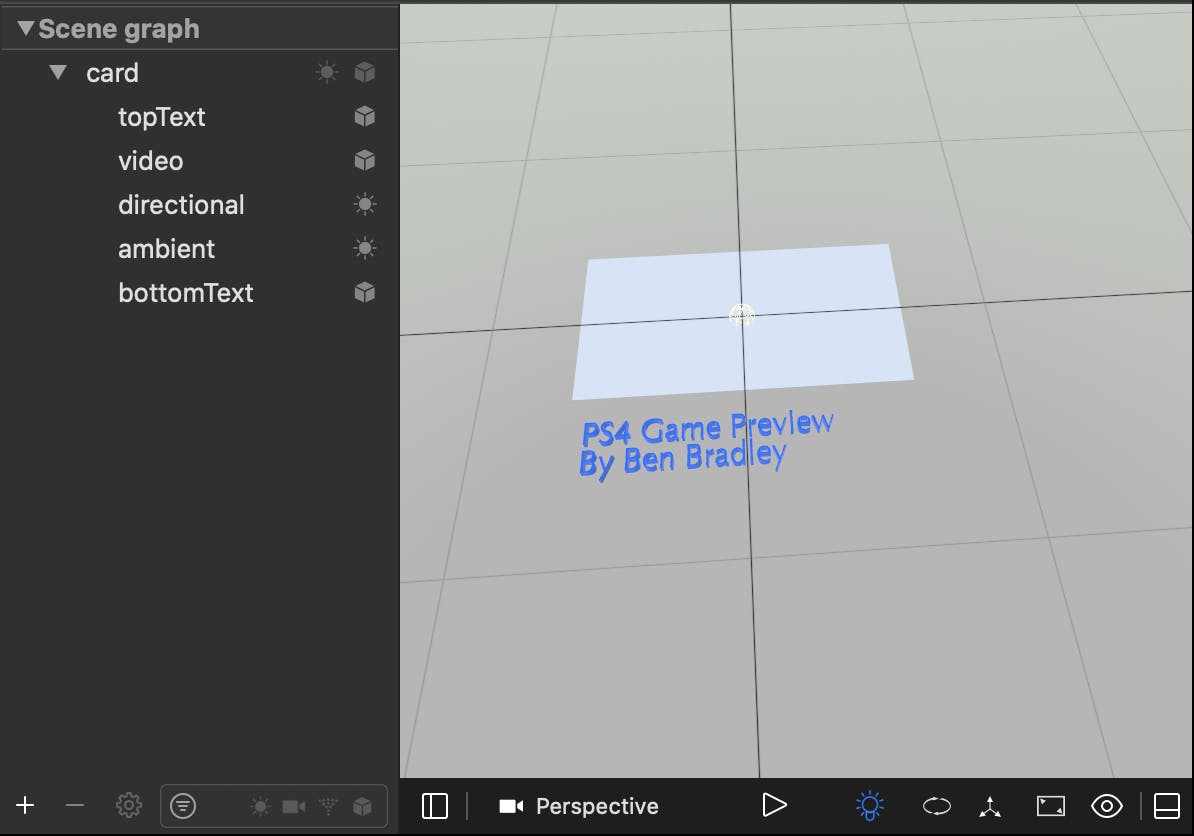
Ok, now that we have something for the app to track, it's time to add content to the view. We can create a scene, in the file structure, right click on 'art.scnassets' to create a new file. Call it what you'd like but I have named mine 'card.scn'. Double click on your new file to open the editor. You can create a scene by adding nodes acting as child nodes. Add new nodes by clicking + at the bottom of the left of the editor. Customize it how you like, the one I am demonstrating is simply a rectangle with some text below and a bit of ambient lighting for effect.
We now have our photo references and our scene. Before we can code, let's add some media related to what the app will show once a reference enters the view(camera) of the app. I have added 3 .mov files to the main project folder. Be sure to name these files the same as your image files (referencing each other. For example the 'witcher.jpeg' would have a 'witcher.mov'), the extension may be different but the name itself needs to be identical.
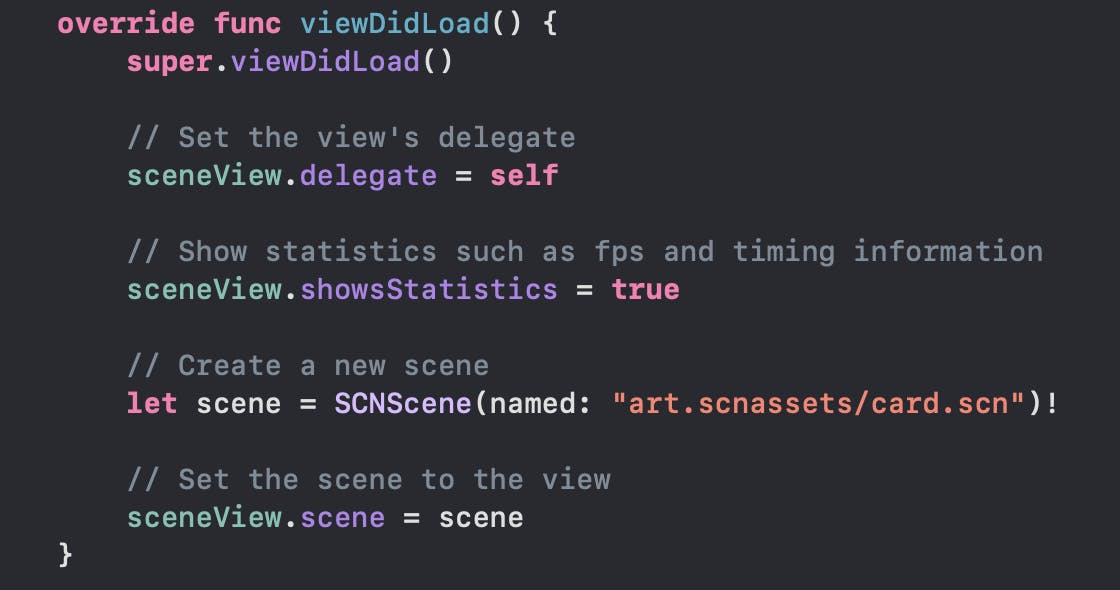
We now have our resources set and ready, so let's bring it together with some code. Working in the ViewController.swift file, start in the viewDidLoad function. Replace "ship" with whatever you named your scene file, this way the app knows where it is.
Now moving over to the viewWillAppear function, we need to indicate where our image resources are and create a session (We are also telling our configuration to track these photos) by stating the following:

Following the willDisappear function there is a commented out block of code. Uncomment this section. When the image appears in the view, this function will be called. Add the following code:
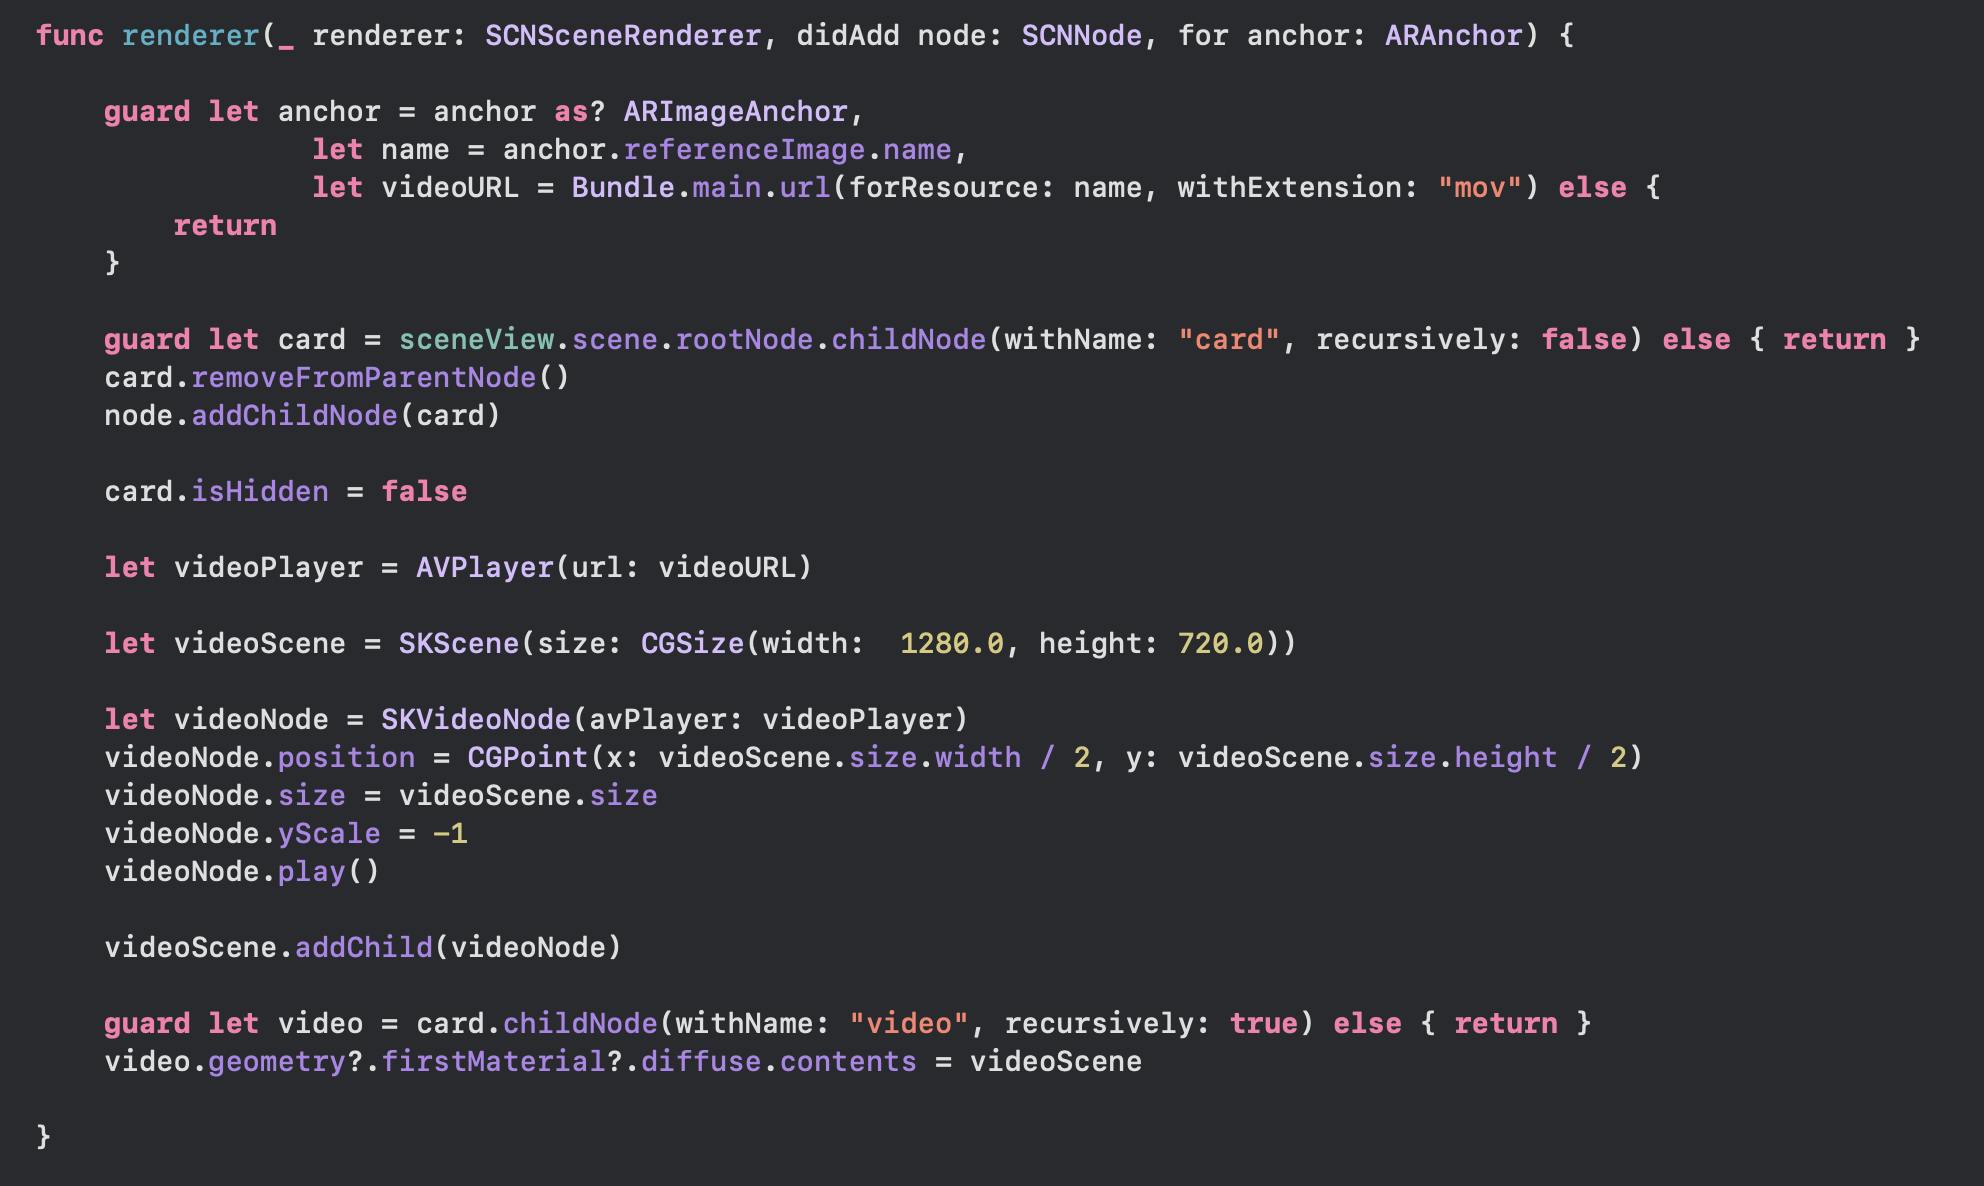
This block of code starts by checking if there is something in the view, then pulls the name of the image from its resources file, using that file name, it will find the matching video. Once it has the info it needs, it assigns the video to the card scene, places it on top and and renders itself to the view. There are several ways to reposition the scene to suit your needs but this gives an example of how it can be done. In this example the video is bannered over the centre of the game case Followed by app title and name.
Once you have completed the project give it a run and see how it works. Click here to see the game tracking app demonstrated!